Recipe Round-up: Treats for holiday parties

Every week (or so) I post a list of recipes that have caught my eye from other food blogs around the web. Here are some that I’m itching to try for the holiday parties we are hosting and attending this weekend.

We’ve got blue cheese and fig crackers, brownies, pecan pie, toffee and pralines!

Continue reading

Cupcakes!

Cupcake!.

This is a cupcake version of one of my family’s favorite cakes, the aptly named “Chocolate Cake with White Fluffy Icing”

The name says it all, really. This is a delicious chocolate cake with a whipped marshmallow-y icing on top. There is surprisingly little fat in these delicious creations– just 1/2 cup of oil for over 18 cupcakes, but there is plenty of sugar so I don’t feel comfortable calling them “healthy”. Instead, they are simply “less bad”.

The cake is moist, and has a rich chocolaty flavor. I’m pretty sure the original recipe comes from Hershey and can be found here (where you can also find the recipe for low altitude).

I’m going to post the recipe for the cake here today and the recipe for the icing tomorrow so as not to overwhelm you. This cake would also be tasty with a little whipped cream on top, chocolate buttercream, vanilla buttercream or any of your other favorite icings.

What you need:

  • 1 3/4 cups + 2 tablespoons unsifted all-purpose flour
  • 1 3/4 cups sugar
  • 3/4 cup powdered cocoa
  • 1 1/4 teaspoons baking soda
  • 1 1/4 teaspoons baking powder
  • 1 teaspoon salt
  • 2 eggs
  • 1 cup milk
  • 1/2 cup vegetable oil
  • 2 teaspoons vanilla
  • 1 cup boiling water
  • Icing

What to do:

  1. Combine the dry ingredients in a large mixer bowl.
  2. Add the eggs (beaten), milk, oil and vanilla. Beat for 2 minutes at medium speed (or just use a whisk) until all the lumps are incorporated.
  3. Stir in the boiling water and mix again until it is incorporated. You’ll have a very soupy concoction at this point– that’s what you want.
  4. Now pour the batter into 18 lined cupcake tins– fill about 3/4 of the way up– or, into a greased and floured 13″ x 9″ x 2 ” pan.
  5. Bake at 350 degrees for 15-18 minutes for cupcakes (or until a toothpick comes out clean) or 35-40 minutes for a cake.
  6. Allow to cool before frosting.

Magic Cookie Bars


These are pretty much “seven layer bars” but there are only six layers because I don’t like the butterscotch chips. This recipe is so easy and based on this recipe.

What you need:

  • 1 1/2 cups crushed graham crackers
  • 1 stick of butter, unsalted
  • 1 14-oz. can of sweetened condensed milk (not evaporated)
  • 1 1/2 cups dark chocolate chips
  • 1 1/3 cups coconut flakes
  • 1 cup chopped nuts

What to do:

  1. Preheat oven to 350 degrees.
  2. Place the stick of butter into a 13 x 9 inch baking pan and place it in oven– let it melt, but make sure it doesn’t burn– about 5 minutes.
  3. Pound some graham crackers in a large zip-lock bag until you have a cup and a half.
  4. Take the melted butter and baking pan out of the oven
  5. Mix the graham cracker crumbs into the butter in the pan until all the crumbs are buttered, then press into an even layer at the bottom of the pan
  6. Cover with the sweetened condensed milk.
  7. Cover the milk with the chocolate chips
  8. Cover the chips with the coconut.
  9. Cover the coconut with the nuts.
  10. Lightly press down on the conglomerate with your fingers or the back of a clean measuring cup.
  11. Bake for 25 minutes.
  12. Remove from oven, and let cool in pan before cutting.

*The edges will be quite crispy which I like, but if you don’t, you can line the pan with aluminum foil.

Bittersweet Chocolate Pudding Pie with Crème Fraîche Topping


I have made this pie twice. The first time, I couldn’t find crème fraîche so I just made some good ole’ whupped cream and let people top the pie off themselves. It was fantastic, and oh so incredibly rich! The pie is amazing. I thought, my dad would LOVE this. So, I made him this pie for his birthday and this time I followed directions because I love my dad and I wanted it to be EVEN MORE PERFECT. Except, it turns out that it wasn’t better. In fact, it wasn’t even as good as the first time! I didn’t like the crème fraîche topping. It was actually too rich for the pie and didn’t complement as much as the plain Jane whipped cream. And so it goes. Regardless, I will supply you with the recipe as it is supposed to be (copied directly) from Bon Appétit, January 2008. And I will encourage you to ignore the part about the crème fraîche and just get a little bit of whipping cream, and whip it up with a little bit of sugar.

What you need:

Crust:

  • 1 cup chocolate wafer cookie crumbs (about half of one 9-ounce package; about 23 cookies, finely ground in processor)
  • 2 tablespoons sugar
  • 5 tablespoons unsalted butter, melted
  • 2 ounces bittersweet chocolate (60% cacao), finely chopped

Filling:

  • 1/3 cup sugar
  • 1/3 cup unsweetened cocoa powder
  • 2 tablespoons cornstarch
  • 1/8 teaspoon salt
  • 1 3/4 cups whole milk, divided
  • 1/4 cup heavy whipping cream
  • 4 ounces bittersweet chocolate (60% cacao), finely chopped
  • 1 tablespoon dark rum
  • 1 teaspoon vanilla extract

Topping:

  • 1 cup chilled crème fraîche*
  • 1 cup chilled heavy whipping cream
  • 1/4 cup sugar
  • 1 teaspoon vanilla extract
  • Bittersweet chocolate shavings or curls (optional)

What to do:

Crust:
Position rack in center of oven; preheat to 350°F. Blend cookie crumbs and sugar in processor. Add melted butter; process until crumbs are evenly moistened. Press crumb mixture onto bottom and up sides (not rim) of 9-inch-diameter glass pie dish. Bake until crust begins to set and no longer looks moist, pressing gently with back of fork if crust puffs, about 12 minutes. Remove crust from oven, then sprinkle chopped chocolate over bottom of crust. Let stand until chocolate softens, 1 to 2 minutes. Using offset spatula or small rubber spatula, spread chocolate over bottom and up sides of crust to cover. Chill crust until chocolate sets, about 30 minutes.
Filling:
Whisk sugar, cocoa, cornstarch, and salt to blend in heavy medium saucepan. Gradually add 1/3 cup milk, whisking until smooth paste forms. Whisk in remaining milk, then 1/4 cup cream. Using flat-bottom wooden spoon or heatproof spatula, stir mixture constantly over medium heat, scraping bottom and sides of pan until pudding thickens and begins to bubble at edges, about 5 minutes. Add chocolate; stir until mixture is smooth. Remove from heat; stir in rum and vanilla. Pour hot pudding into crust and spread evenly. Cool 1 hour at room temperature. Cover with plastic wrap; chill overnight. DO AHEAD: Can be made 2 days ahead. Keep refrigerated.
Topping:
Using electric mixer, beat crème fraîche, whipping cream, sugar, and vanilla in medium bowl just until stiff peaks form and mixture is thick enough to spread (do not overbeat or mixture may curdle). Spread topping decoratively over top of pie, swirling to create peaks, if desired. DO AHEAD: Pie can be made 6 hours ahead. Cover with cake dome and refrigerate.
Sprinkle chocolate shavings decoratively atop pie, if desired. Cut pie into wedges and serve.
* Sold at some supermarkets and at specialty foods stores.


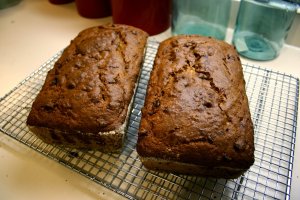
Banana Bread

Ingredients:

  • ¼ C vegetable oil or melted butter
  • 2/3 C. sugar (you can use white or brown)
  • 1 egg 3 large mashed over-ripe bananas
  • 1 t. baking powder
  • 1 t. baking soda
  • ¾ t. salt
  • 2 C. flour (I like half white and half whole wheat pastry flour)

Optional:

  • ¾ C. nuts –OR–
  • ¾ C. strawberries or mixed berries (either fresh or thawed from frozen) –OR–
  • ¾ C. semi-sweet chocolate chips

What to do:

  1. Mash the bananas
  2. Add the sugar, eggs and oil and mix.
  3. Add the dry ingredients and fold until mostly incorporated.
  4. Depending on how crazy you want to get, add one (or more if you’re really crazy) to the batter and fold in.
  5. Pour the batter into a greased and floured (or sugared*) loaf pan
  6. Bake at 350 degrees for 1 hour.

*When I use chocolate chips, I like to grease the pan by putting some butter in the bottom of the pan and sticking it in the oven for about a minute to melt it. Then I use the melted butter to grease the pan. And, because it is so good, I then dump sugar in the pan instead of flour and toss it around to coat the bottom. This creates a nice crunchy edge for a dessert bread. That is what is creating the edge in the picture below (mmmmm):


P.S. Edward made these for a potluck tomorrow from my tried and true recipe. I’m so proud.